by Andy Bell | Feb 21, 2012 | Editing, Photo Class |


“Lamp”; February 20, 2012, 10:00pm; Rexburg, ID; f/4; 1/40; Canon T3i; 3-shot HDR processed with Photomatix Pro
I added a border. I extended the canvas size (and filled it with color), then drew a rectangle on the image, masked the inner side of the rectangle out, and then blurred the inner edges of the inner rectangle with motion blur.


“Lights”; February 20, 2012, 11:56pm; Rexburg, ID; f/10; 20″; Canon T3i
For this one I duplicated the image layer, then changed the new layer to multipy, which darkened most parts. I then deleted the middle portion of the new layer to show the original through. Then I made a blank layer and used a black brush at 30% to darken the lights in the darkened portion.


“Circles”; February 20, 2012, 10:25pm; Rexburg, ID; f/4.5; 8″; Canon T3i; Sharpening added
For this one, I cropped it, then I used a rectangular marquee selection to create a mask, used the sprayed strokes filter, removed the mask, inverted the selection, and filled the inverted selection with black. The tutorial is in Esplin’s Custom Images book.


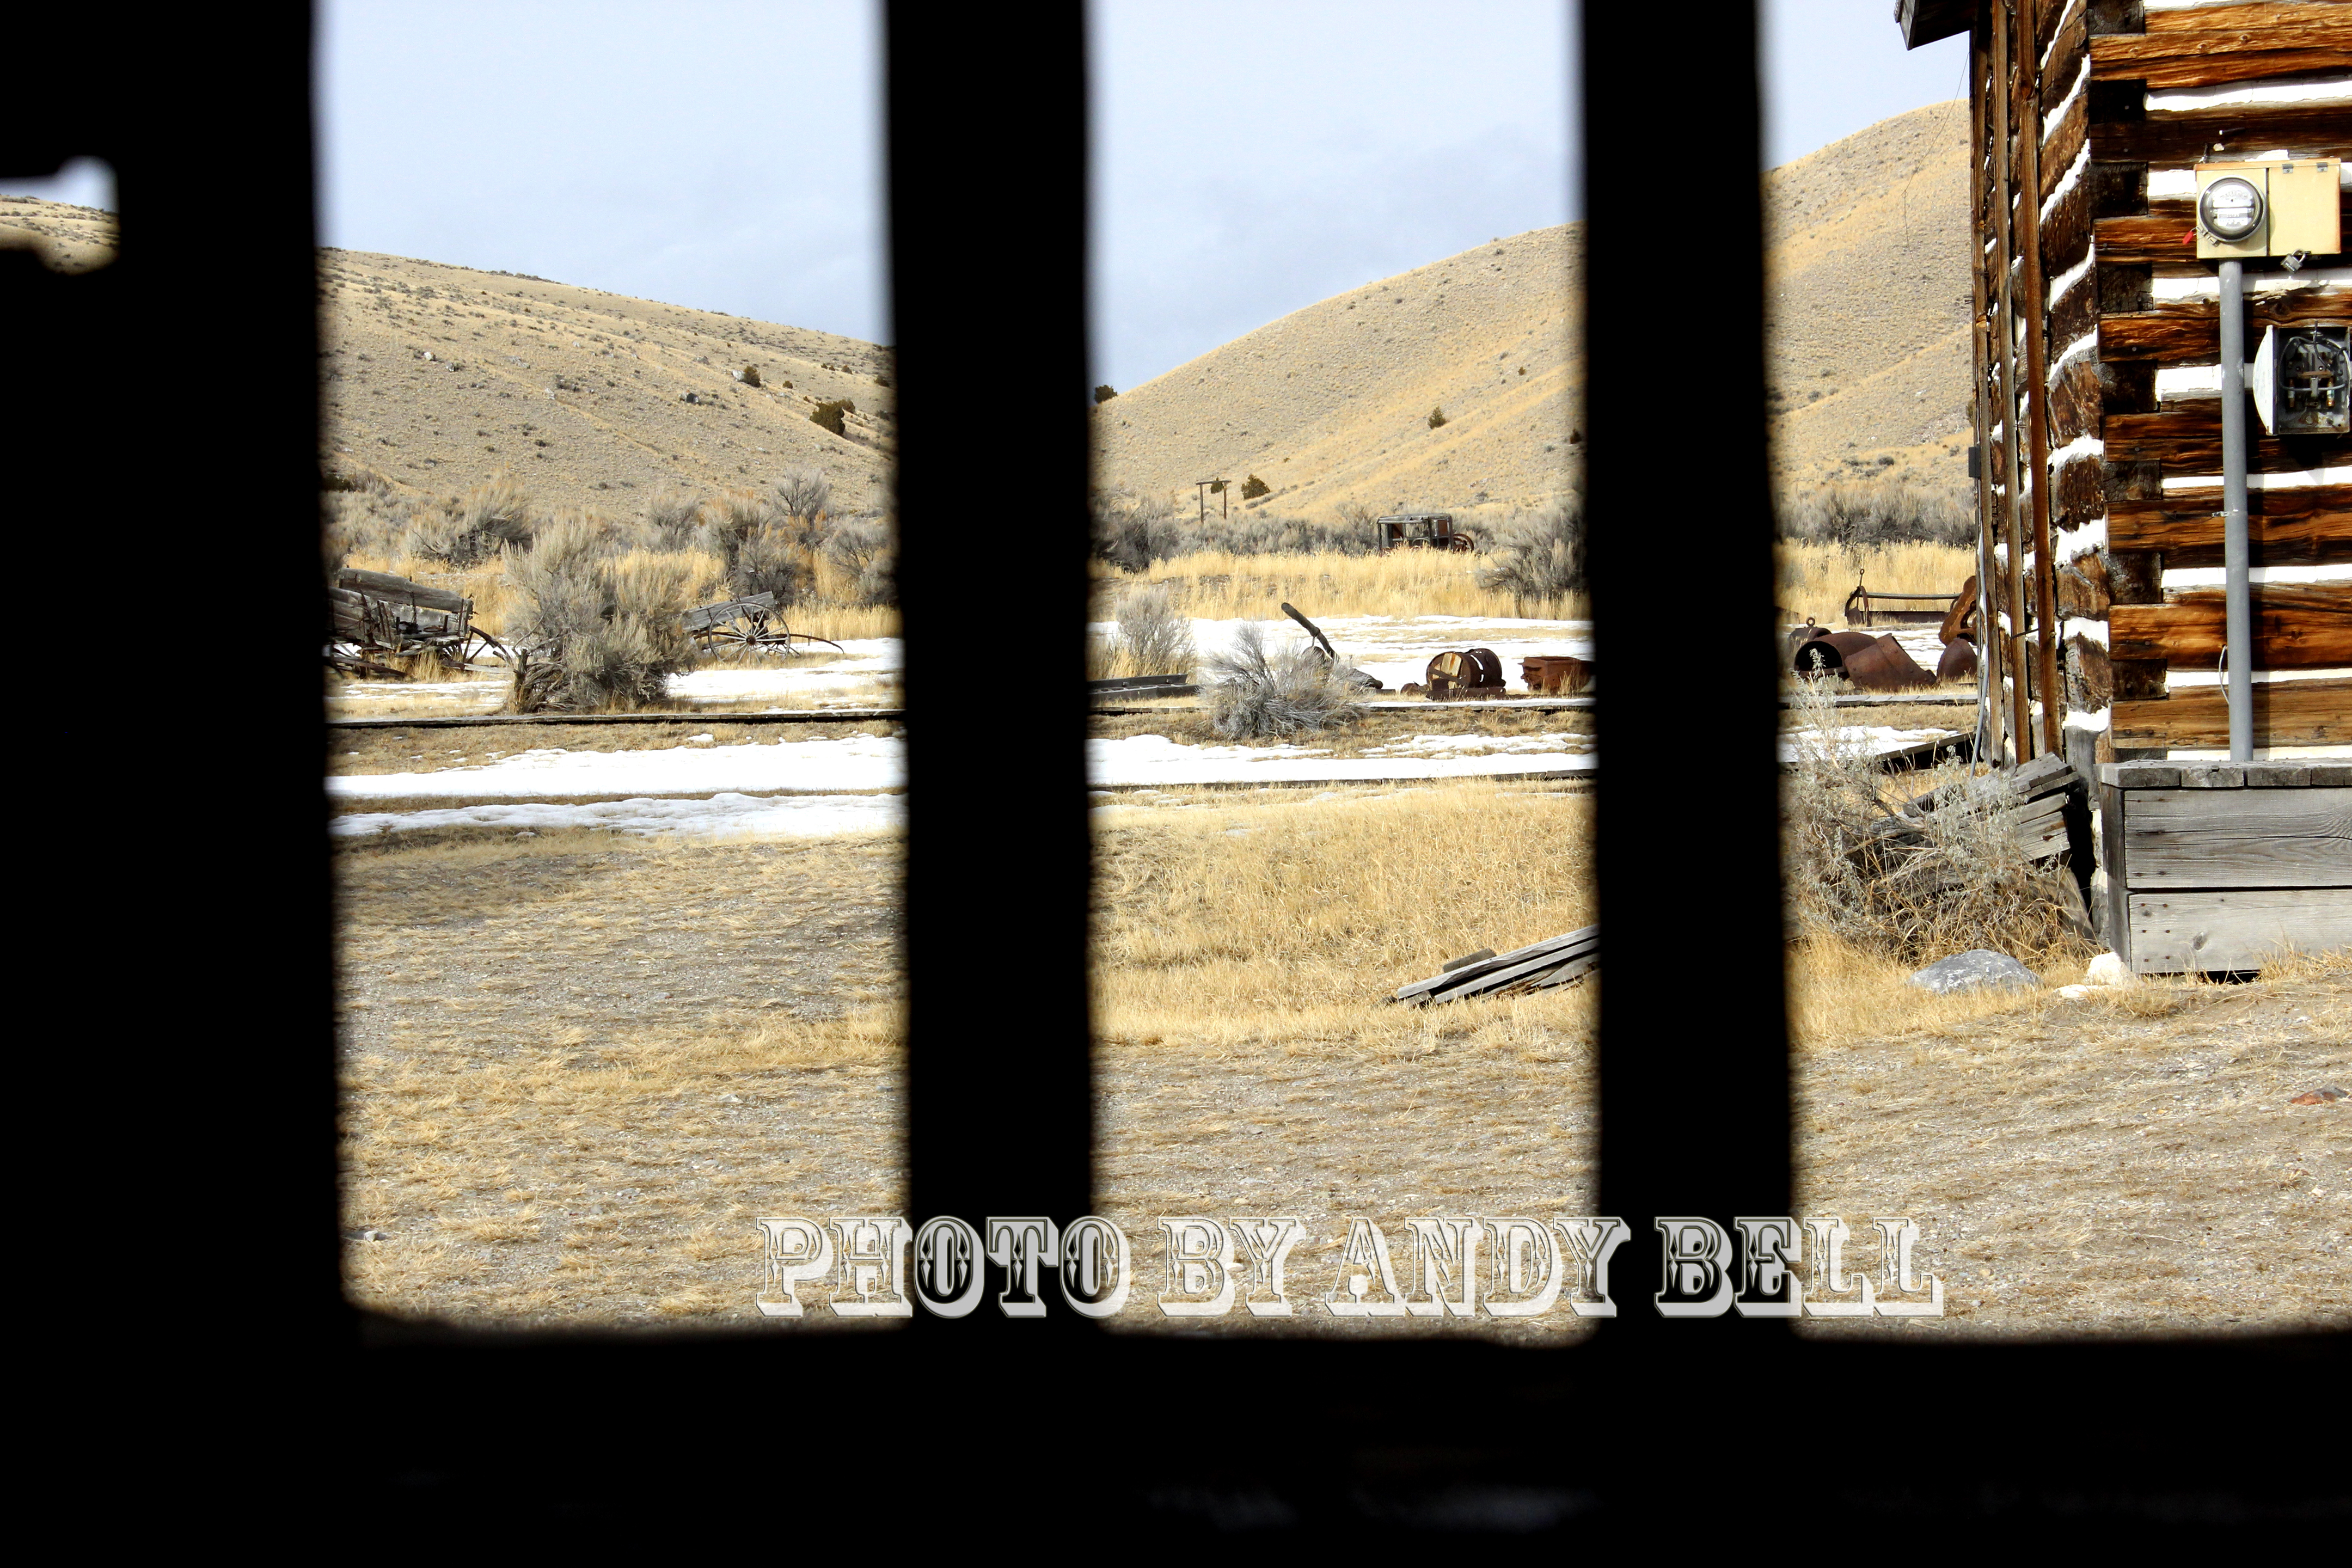
“Bannack Schoolhouse”; February 10, 2012, 4:06pm; f/7.1; 1/125; Canon T3i; 3-shot HDR with +/- 2 processed with Photomatix Pro
I created a nice white background, added some black squares, added my text, and used the squares as a mask to mask in the photo. Then I just framed it up!
by Andy Bell | Feb 15, 2012 | Bannack, Editing, Photo Class, Photography |
The following are some of the other best shots I took at Bannack State Park. They’re in no particular order, or presented with any rhyme or reason.

“I Didn’t Know I Was In a Horror Movie”; February 10, 2012, 2:30pm; f/5.6; 1/100; Canon T3i; Cropped to 8×10 proportions to zoom in on subject, and a little sharpening was applied
Fun fact: this doll was purchased at a thrift store. There’s no question in my mind why this thing was donated. It fits in perfectly with the vibe of a ghost town.

“We Done Been Robbed!”; February 10, 2012, 2:41pm; f/3.5; 1/30; Canon T3i; HDR with automatic bracketing, processed by Photomatix Pro (trial)
I was a little surprised to see what looked like a small vault of some kind in the hotel at Bannack State Park. It was hard to get a single good picture of it, so I decided to try an HDR. I decided to give this photo a cinematic look. I cropped it to a 2.39:1 aspect ratio, which is one of the most common theatrical aspect ratios. I used the black and white preset in Photomatix to process the HDR, and added noise and burned edges in Photoshop to make it look a little older. The way I picture this scene in my head is that the camera slowly pulls back, fully revealing the empty vault, much to the anger of the vault’s owners.

“The Gallows”; February 10, 2012, 3:33pm; Bannack State Park, MT; f/14; 1/500; Canon T3i
There’s a story behind this photo. From what the park ranger told us, this photo was taken from Bannack’s original jail. But in the distance, in almost the center of the photo, is what used to be the gallows. It must have been quite intimidating to stare out of the jails single window into the distance and see where you could be ending up in a few days. It can be kind of hard to see the gallows in this small size though, so you can view an (almost) full-size image. WARNING: it’s about 7MB. (I say almost, because my WordPress installation won’t allow uploads that large.)

“Wagon Wheel”; February 10, 2012, 11:34am; Bannack State Park, MT; f/3.5; 1/40; Canon T3i; Sepia-ed in Photoshop
This one is completely unedited except for the application of sepia tone.

“Teeth”; February 10, 2012, 10:40am; Bannack State Park, MT; f/5.6; 1/60; Canon T3i
I don’t really know for sure what this is, other than a part of an old wagon, but it looks like teeth of some kind. I really don’t know though. The only editing I did was a small levels adjustment.
by Andy Bell | Feb 15, 2012 | Bannack, Editing, Photo Class |
The following photos were created using the trial version of Photomatix Pro.

“Reflections”; February 10, 2012, 2:52pm; Bannack State Park, MT; f/8.0; 1/160; Canon T3i + Photomatix Pro + Adobe Photoshop CS5.1 (3 Shot HDR)
Holy cow, was I lucky to get this shot. I set up my camera to do automatic bracketing at 0, +2, and -2; and then set continuous shooting. When the moment was right, I held down the camera’s shutter until I heard it click three times. The lighting was all natural, so I didn’t have to worry about a flash or anything like that. The image needed few adjustments in Photomatix, but I did have to remove a little ghosting along the left-hand side of his face. Finally, I applied a little sharpening to his eyes in Photoshop. I’m pretty proud of this shot, even though it’s mostly pure luck that kept him still enough for me to get this.
And yes, this is the portrait HDR that Sister Esplin was talking about, except I cleaned it up a little more.

“Bannack Shoolhouse”; February 10, 2012, 4:07pm; Bannack State Park, MT; f/10.0; 1/250; Canon T3i + Photomatix Pro; Bracketed at -2
This is an HDR created from a single shot in Photomatix. I just let it do its thing and applied the painterly preset. And that was it!
by Andy Bell | Feb 15, 2012 | Bannack, Editing, Photo Class |


“The Volute”; February 10, 2012, 2:27pm; Bannack State Park, MT; f/4.5; 1/60; Canon T3i
“Red Wall”; February 10, 2012, 11:23am; Bannack State Park, MT; f/5.6; 1/50; Canon T3i

I like the way this texture makes the knob part of the volute look like it either has a lot of dust on it or possibly even a ridiculous number of scratches and other blemishes. To add the texture image, I used the move tool to move only the red channel of the texture image into the volute image, and then I masked it out everywhere but the knob. And yes, I did have to look up on Wikipedia to see what the different parts of stairs were called.
by Andy Bell | Feb 8, 2012 | Editing, Photo Class |


Original (left), January 7, 2012, 9:59pm, f/5.6, 1/60, Canon T3i, flash fired
Better Color (right), January 7, 2012, 9:59pm, f/5.6, 1/40, Canon T3i

On the original photo, I forgot that the flash was going to fire, so it created a bad, kind of washed-out color. However, that was the best pose I got out of her, so I decided to make this my color match. It’s really easy: just choose Image > Adjustments > Match Color, choose the better photo as the source, and that was it! Sometimes Photoshop feels like a complete miracle!
")

The Happy Couple, February 7, 2012, 10:04pm, f/5.6, 1/13, Canon T3i
For this I decided to take the background color and replace it. It’s easy: Image > Adjustments > Replace Color. Then you choose the color you want to replace, adjust sliders to capture the most of that color you can without grabbing any other color, and then adjust sliders to choose which color you want to change it to. For this I went with a brownish background. I’m just imagining the possibilities with a green screen!


Self Portrait, January 8, 2012, 9:35am, f/5.6, 1/50, Canon T3i
When trying to decide which portrait to enhance, not having talked to anyone about Photoshopping them, I decided “my Facebook profile pic is a blurry piece of crap and maybe it’s time to fix that!” So I set up my camera, pointed it at the couch, got some focus, and set the timer. Because I have a T3i, the screen could rotate towards myself so I could set myself on the thirds. Then I cropped to focus in on my face more and did some enhancements. I whitened my sadly non-white teeth, removed some blemishes, and did a little airbrushing (but not much, I didn’t want to make myself look like a fashion magazine). Then I just got rid of the distracting windowsill above my head and a very stray and noticeable piece of hair!
by Andy Bell | Jan 30, 2012 | Editing, Photo Class |
The Adobe Camera Raw Plugin is AMAZING!


“Moose Macro”; January 23, 2012, 10:33am; Rexburg, ID; f/5.0; 1/30; Canon T3i
I adjusted brightness and light to make the photo look good. Then I used an adjustment brush to paint on the sides of the moose, defocusing and lowering brightness and exposure significantly, while leaving the main part of the moose untouched. All in Camera Raw. (Edited from a JPEG.)


“Flower”; January 21, 2012, 10:57pm; Rexburg, ID; f/4.5; 1/13; Canon T3i
Again, Camera Raw plugin using a JPEG. I first made the picture a little more balanced (using the auto setting in Raw), then I used an adjustment brush to bump up the clarity, saturation, and brightness and exposure of the flower, almost giving it a slight halo.


")


